Following are FAQs for questions about various products we frequently receive. If you have a question or issue not addressed below, please contact Customer Care.
- Digital Banking
- Setting up Direct Deposit
- Digital Bill Pay
- Digital Card Controls
- Zelle®
- Overdraft Information for Checking Clients
- Debit Card FAQs
Visit secure.mycsbin.com/enroll and follow the on-screen instructions.
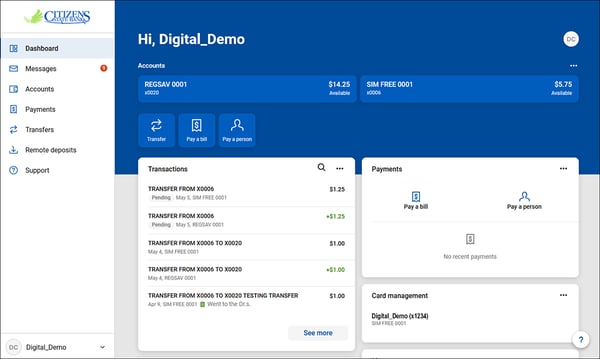
As a Citizens State Bank Digital Banking user you are able to customize the layout and configuration of your Digital Banking Dashboard.
To modify your dashboard click on Organize Dashboard. Within this screen you can re-order the modules you see, add additional modules to your dashboard by clicking on "+Add Card", or remove modules you no longer wish to see.
You can view the Organizing My Digital Banking Dashboard Guide for additional details.
Use the “Forgot” option and follow onscreen instructions to reset your password. If that doesn’t work, contact Customer Care.
NOTE: If too many login attempts are made with an incorrect verification code, your account will be temporarily locked. Don't try to set up a new account or change your password during this time.
If you have questions or need help, please contact Customer Care at 888-529-5450.
You can edit your name, add a photo, update your telephone number and your email address by clicking "Settings" then "Profile."
To update your mailing address, please contact Customer Care (888-529-5450).
Two-factor authentication (2FA) is a security feature that helps protect your account information. To implement 2FA:
- Enroll your email address and phone number
- Choose to receive your one-time code via text or automated call
- After entering your code, you can choose "Don't ask for code again on this computer" to avoid entering a code every time you log in. (This option should never be selected on a shared or public computer.)
There are a few things that can cause this to happen:
- Logging in using different browsers, even on the same computer
- If your browser history is deleted
- If your browser is set up to delete your cookies and history automatically
If you are having issues accessing online banking, you should clear the cache and cookies in your browser. This can be a quick fix for your issue, including problems resetting your password.
Desktop Browsers:
Mobile Browsers:
Note: Microsoft Internet Explorer has been officially retired by Microsoft and is no longer supported.
Enable Fingerprint (Android):
- Select Settings
- Select the toggle next to Biometric sign-in
- Touch the sensor with your finger to verify your fingerprint
- If you have not already registered a fingerprint on your device, you'll be prompted to do so
Enable Touch/Face ID (iOS):
- Select Settings
- Select Security Settings
- Select the toggle next to Touch ID to Login
- Select Enable Touch ID
On the login screen, choose the “Forgot?” option and follow the onscreen instructions.
If you're using an Android:
- Select the "hamburger," or 3 lines in the upper left corner
- At the bottom of your menu, click the drop down ↑↓ then select "Settings"
If you're using an iPhone:
- Select the "hamburger," or 3 lines in the upper left corner
- Click on your name in the lower left corner of your screen
- Choose "Settings"
You can hide accounts - while on the dashboard, choose the account you'd like to hide, then choose the "Settings" tab and toggle the "Display" button to Off. If you change your mind, just turn the toggle switch back to On.
If you run into any challenges renaming your account please contact us and we'll be happy to assist.
Yes, you can see both the front and back of checks that have cleared.
- Choose the account, then the transaction you want to review
- This will open a Transaction Details window
- Click the image to see the front, and the View Back link to see the back
You can also make Notes or add Tags or Images in the Transaction Details window.
- If an item shows as Pending you'll see basic details of the transaction like amount, date, etc.
- After an item has posted, you'll see full details and be able to add a Tag, Notes, an Image, etc.
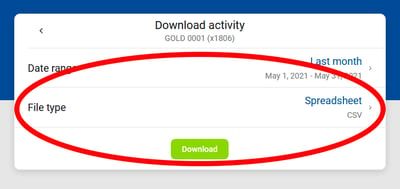
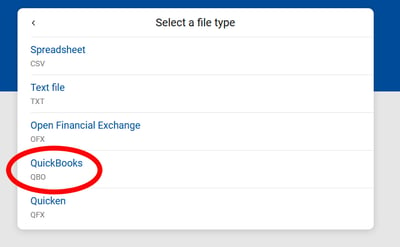
- If you export transactions, you'll see all details of posted ACH items
To take advantage of Transaction Management:
- Choose the correct account
- Tap transactions to see the Transaction Details window
- From here, you have the options to add Notes, Tags, or Images and, if the transaction is a cleared check, viewing the front and back of the check
Complete this Enrollment Form.
After enrollment, your electronic statements are accessible by clicking the account and choosing the Documents tab. From there, choose the statement you'd like to see.
In the Settings area, select User Alerts and follow the instructions.
If your debit card has been lost or stolen,
- Go to the Card Management section of your Dashboard
- Choose the correct debit card(s)
- Select Report Lost/Stolen, then follow onscreen instructions
- Go to the Card Management section of your Dashboard
- Select Activate New Card
- Follow the onscreen directions
- Choose Card Management on your Dashboard
- Select the correct debit card
- Click the Toggle button and confirm you want to lock your card
- To unlock the card, click the Toggle button again and your card status will change to Active
To set up spending limits:
- Go to the Card Management section of your Dashboard
- Select Alerts and Protections
- Then Spending Limits
- Complete the fields as directed
- Go to the Card Management section of your Dashboard
- Choose the type of Alert you'd like to receive - by Location, Merchant Type, Transaction Type, or Spending Limit
- Follow the onscreen instructions
Yes, you can choose to receive Alerts via Email, In-App Messages, or Text.
- Go to the Card Management section of your Dashboard
- Choose Alerts and Protections
- Then choose Notification Settings
Go to the Card Management section of your Dashboard. Choose the correct debit card, then choose Alerts and Protections. From there, determine the type of protection you'd like to set up. Common examples:
- To prevent your debit card from being used for making online purchases, go to Transaction Types and block eCommerce transactions.
- To ensure your HSA debit card is only used for approved purchases, you can choose to go to Transaction Types and/or Merchant Types and block the options you wouldn't use to pay for medical-related purchases.
- Save time. With Digital Bill Pay, you can receive and pay your bills online, all in one place. No more visiting multiple websites to pay bills or trips to the post office to mail checks. In addition, smart features such as recurring payments allow you to automate regular bill payments.
- Save money. Paying bills online saves on postage, envelopes, late fees and checks. If you pay just 10 bills per month, you can easily save over $110.00* per year.
- Stay organized. Your payment history is stored in your online account, so you won't have to sort through paper receipts or visit multiple websites to access past transactions.
- Gain peace of mind. Paying bills electronically means no risk of mailed checks getting lost or stolen. Plus, you can stop worrying about missing a bill payment when you set up reminders and automated recurring payments.
- Help the environment by saving paper. With Digital Bill Pay, there are no checks to write or envelopes to mail. That's good news for you and the environment.
*Savings are approximate and based upon the average annual cost of stamps, envelopes and checks required for paying 10 bills per month.
To enroll
- Choose the Bill Pay tab
- Follow the onscreen instructions
- Accept the agreement
You're ready to get started!
If this is the first time you are paying a vendor:
- Choose + New Payee
- Choose Company or Person
- Complete the fields as directed
- After the payee is set up, choose Pay This Bill and follow the instructions
If the vendor has already been set up:
- Choose the correct Payee from your Payee List
- Enter the payment amount
- Schedule your payment date
- Access detailed instructions for "Adding a Payee in Bill Pay 'Pay a Person'"
- You can also use Zelle® to send money securely to an individual.
Payments may process electronically or by check - it depends on the vendor. The goal is to deliver your payment securely, using the fastest method available for your payee.
Electronic payments will either process through ACH or by virtual card. All other payments are made by paper checks that are mailed via the U.S. Postal Service.
For Citizens State Bank loans, you have a few options:
- Choose your payment account on your Dashboard, then Transfer. Choose the loan account to transfer to, then follow the onscreen instructions.
- Choose your loan account on your Dashboard, then the green Pay button and follow the instructions.
- Choose Transfer on the Dashboard and complete fields as directed.
To pay a loan with someone other than Citizens State Bank, set the financial institution up as a Payee in Bill Pay and schedule payments as you would with any other vendor.
After you’ve chosen a Payee and entered your Payment Amount, you’ll see when the payment will be sent underneath the Submit button. (“Sends today electronically, arrives by tomorrow.”)
To select a different frequency or date, choose More Options, select the date, then Submit.
Select Payments from your Dashboard.
- If the status is Scheduled, you can change or cancel your payment
- Select the payment, make your desired changes, then click Save
- If the status is Paid, you are unable to make changes
To set up payroll through business bill pay, start by clicking on Bill Pay → Manage Payments → Payroll.
- If this is your first payroll deposit, the Payroll Setup Wizard will walk you through a simple, three-step process. First, select Schedule Now.
-
Set up a new payday schedule → submit.
-
Next, Add Employee → enter employee information, status and pay type.
-
Enter employee account information → submit.
-
Now Schedule Payday.
-
Review payroll information → payment details →
-
Once your payroll is scheduled, you’ll be able to view a summary on the Payroll tab.
You can send, request, or receive money with Zelle®. To get started:
- Log into digital banking
- Select Send Money with Zelle®
- Follow the on-screen instructions
To send money:
- Select someone from your mobile device’s contacts (or add a trusted recipient’s email address or U.S. mobile number)
- Add the amount you’d like to send and an optional note
- Review, then hit Send
The recipient will receive an email or text notification via the method they used to enroll with Zelle®. Money is available to your recipient in minutes if they are already enrolled with Zelle®.
To request money using Zelle®:
- Choose Request and select the individual from whom you’d like to request money
- Enter the amount you’d like, include an optional note
- Review and hit Request
If the person you are requesting money from is not yet enrolled with Zelle®, you must use their email address to request money. If the person has enrolled their U.S. mobile number, then you can send the request using their mobile number.
To receive money, just share your enrolled email address or U.S. mobile number with a friend and ask them to send you money with Zelle®. If you have already enrolled with Zelle®, you do not need to take any further action. The money will be sent directly into your Citizens State Bank account, typically within minutes.
If someone sent you money with Zelle® and you have not yet enrolled, follow these steps:
- Click on the link provided in the payment notification you received via email or text message.
- Select Citizens State Bank.
- Follow the instructions provided on the page to enroll and receive your payment. Pay attention to the email address or U.S. mobile number where you received the payment notification - you should enroll with Zelle® using that email address or U.S. mobile number to ensure you receive your money.
Keeping your money and information safe is a top priority for Citizens State Bank. When you use Zelle® within online or mobile banking, your information is protected with the same technology we use to keep your Citizens State Bank account secure.
Your email address or U.S. mobile number may already be enrolled with Zelle® at another bank or credit union. Call Zelle's customer support team (844-428-8542) and ask them to move your email address or U.S. mobile number to Citizens State Bank so you can use it for Zelle®.
Once customer support moves your email address or U.S. mobile number, it will be connected to your Citizens State Bank account so you can start sending and receiving money with Zelle® using Citizens State Bank digital banking tools. Please contact Customer Care (888-529-5450) for help.
Yes, you can access the Zelle® Pay It Safe Education Center to explore resources, test your knowledge, and get new tips on how to keep your money safe in a digital world.
Zelle® is a great way to send money to family, friends, and people you are familiar with such as your personal trainer, babysitter or neighbor.*
Since money is sent directly from your Citizens State Bank account to another person's bank account within minutes*, Zelle® should only be used to send money to friends, family and others you trust.
If you don't know the person or aren't sure you will get what you paid for (for example, items bought from an online bidding or sales site), you should not use Zelle®. These transactions are potentially high risk (just like sending cash to a person you don't know is high risk).
You'll have to ask the small business if they accept Zelle® payments. If they do, you can pay them directly from your Citizens State Bank account using just their email address or U.S. mobile number.
Neither Citizens State Bank nor Zelle® offers a protection program for any authorized payments made with Zelle®, so you should only send money to people (and small businesses) you trust. Always ensure you’ve used the correct email address or U.S. mobile number when sending money.
In order to use Zelle®, the sender and recipient’s bank or credit union accounts must be based in the United States.
The amount of money you can send, as well as the frequency, is set by each participating financial institution. For Citizens State Bank limits, contact Customer Care (888-529-5450).
There are no limits to the amount of money you can receive. However, the person sending you money will most likely have limits set by their own financial institution.
Neither Citizens State Bank nor Zelle® offers purchase protection for payments made with Zelle® - for example, if you do not receive the item you paid for, or the item is not as described or as you expected. Only send money to people and small businesses you trust and always ensure you've used the correct email address or U.S. mobile number when sending money.
Please contact Customer Care at 888-529-5450. Qualifying imposter scams may be eligible for reimbursement.
No, Zelle® payments cannot be reversed.
You can only cancel a payment if the person you sent money to hasn't yet enrolled with Zelle®. To check whether the payment is still pending because the recipient hasn't yet enrolled, you can go to your activity page, choose the payment you want to cancel, and then select "Cancel This Payment". If you do not see this option available, please contact our customer support team at 888-529-5450 for assistance with canceling the pending payment.
If the person you sent money to has already enrolled with Zelle® through their bank or credit union's mobile app or online banking, the money is sent directly to their bank account and cannot be canceled. This is why it's important to only send money to people you know and trust, and always ensure you've used the correct email address or U.S. mobile number when sending money.
If you sent money to the wrong person, please immediately call Customer Care at 888-529-5450 to determine what options are available.
As of March 31, 2025, all users must be enrolled through one of the more than 2,200 banks and credit unions that offer Zelle® in order to send and receive money. The list of participating financial institutions is always growing. If their bank or credit union is not listed, we recommend you use another payment method at this time.
The Zelle® QR code feature is currently not available at Citizens State Bank. The ability to use Zelle® QR code will be available soon.
*To send or receive money with Zelle®, both parties must have an eligible checking or savings account. Transactions between enrolled users typically occur in minutes.
Zelle® and the Zelle® related marks are wholly owned by Early Warning Services, LLC and are used herein under license.
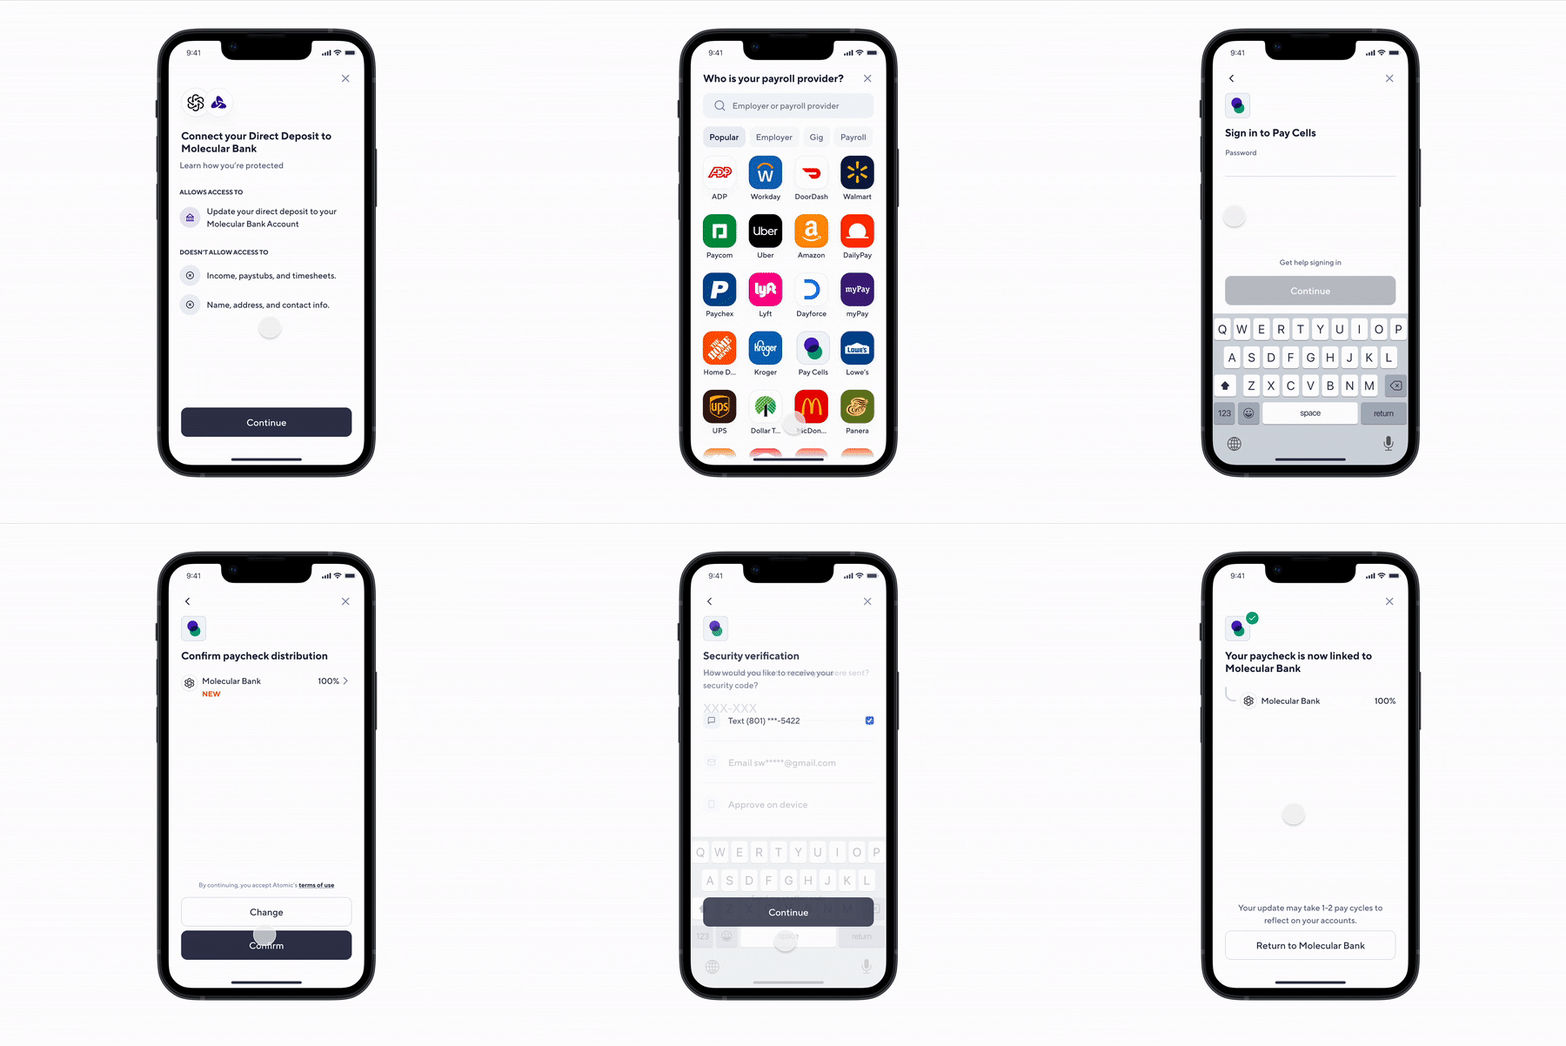
Setting up your Direct Deposit is easy!
- Login to the CSB app or online banking
- Select Set up Direct Deposit
- Search for your payroll provider or employer
- Enter your credentials (💡Pro Tip - make sure you know your username and password before starting set up.)
- Select your account
- You're finished!
If you're unable to set up direct deposit without a form, you can access one in our Switch Kit.

Depending on your payroll provider, your direct deposit can take from one to three pay cycles to take effect.
Call 800-290-7893 to activate your card. If you stay on the line after activation:
- Enter 1 at the prompt
- Set your Personal Identification Number (PIN)
You will not receive your PIN in the mail. If you don't set up your PIN when you activate your card:
- Call 800-290-7893 any time
- Enter your card information
- Press 1 to set up your PIN
Cards are re-issued automatically before your card expires on the last day of the month.
When you receive your new card, activate it and destroy your old card immediately.
To order a new debit card:
- Use Digital Card Controls or Chat in Digital Banking
- Contact Customer Care
- Have a card printed on-demand at your local office
If you've lost your card, be sure to cancel it using Digital Card Controls (or contacting Customer Care) to prevent fraud.
Yes. All Citizens State Bank locations can issue a debit card instantly. (If you're expecting a replacement in the mail, this might not be a good option. Talk to your banker for details.)
You can use your debit card anywhere Visa is accepted, including online and international transactions. If you're traveling, we suggest setting up a Travel Notice to ensure you can use your card and to avoid triggering fraud alerts.
If you use your card internationally, there is a Visa fee between 1 - 3% for of the transaction amount. (This is not a bank fee.)
You can add your card to digital wallets, including Apple Pay and Google Pay, and you can set it up in applications like PayPal.
A debit card removes funds from your checking account whenever a purchase is made.
You apply for a Visa credit card, and approval is based on your credit history and score. If/when you're approved, you'll have a spending limit, monthly payments, and interest charges if the balance isn't paid in full.
No, you cannot cancel or stop payment on debit card transactions.
If you're paying for a subscription with your debit card, you will have to contact the merchant providing the service to prevent future charges.
If you notice fraudulent transactions, we recommend using digital card controls to lock your card immediately:
- Choose this feature in digital banking
- Choose the card you’d like to lock
- Tap the toggle beside the card to lock it
- To unlock your card, tap the toggle back to green
To dispute a charge(s), you can:
- Use the Chat feature in digital banking
- Contact Customer Care at 888-529-5450
- Visit your local office
The daily spending limit on personal debit card purchases is $2,500 and $500 for ATM withdrawals. The limit for business card purchases is $5,000 and $500 for ATM withdrawals.
To request a higher (or lower) limit:
- Use the Chat feature in digital banking
- Contact Customer Care at 888-529-5450
- Visit your local office
To give a debit card to someone else to use, that person would have to be added as a joint accountholder.
If you'd like to have a debit card for your child who is 13 or older to use, you can open a joint account for the child, and we can issue a debit card in their name.
Most merchants do not require a signature to make a debit transaction, however, using your PIN is a more secure way to prevent account fraud.


